
WaiverSign Overview
Quickly and easily create online forms/waivers for your end users to digital fill out
HqO & WaiverSign
Adding WaiverSign to your app allows your endusers to quickly access forms, while also providing a central digital hub for all of your forms & waivrs.
Mobile Experience
-
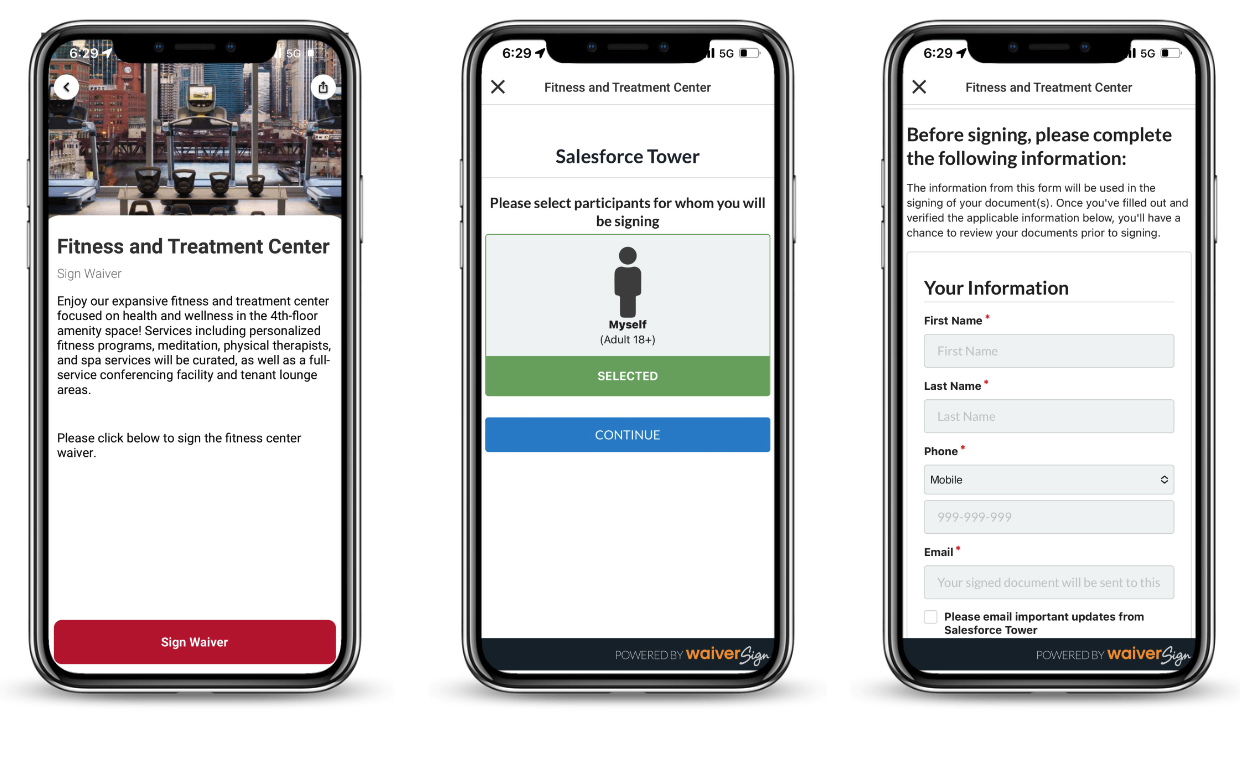
User can submit digital forms (waivers,
-
User can get directions to any specific location
-
Admin can create and edit forms
-
Admin can view signed waivers
-
Admin can receive email notifications when a waiver is signed
Admin Experience
All Admin experiences will remain in WaiverSign’s back office. HqO only supports the Tenant/End User experience via the HqO mobile app.
Configuring WaiverSign
Create WaiverSign Account:
To create your WaiverSign account please reach out to your HqO Implementation Manager or CSM. WaiverSign will create your account and you will then have access to adding/managing your site’s digital forms.
Setting up WaiverSign
Step 1: Navigate to https://app.resmarksystems.com/login/
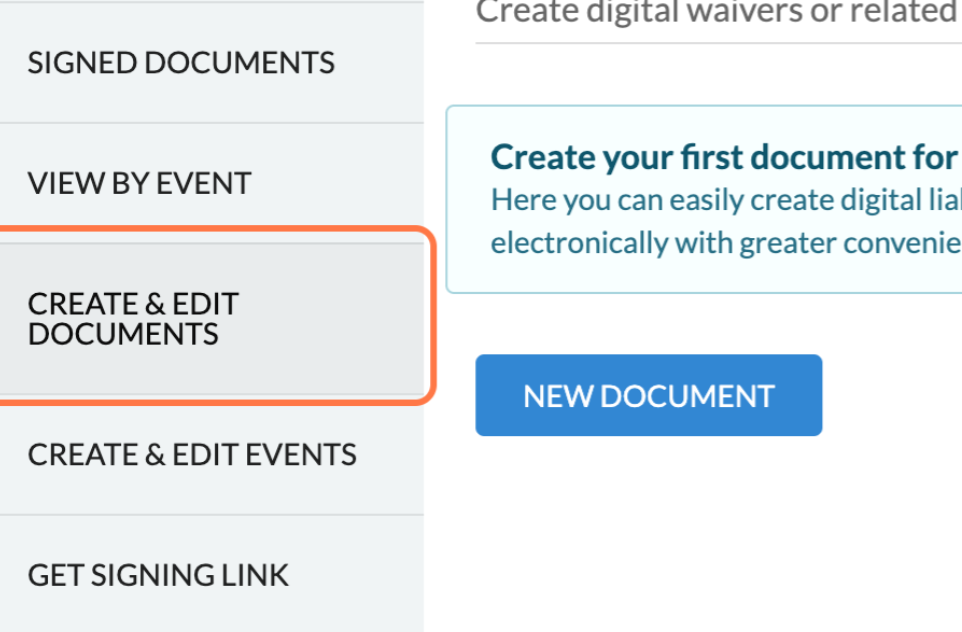
Step 2: Click on ‘CREATE & EDIT DOCUMENTS’ and then the button ‘New Document.’
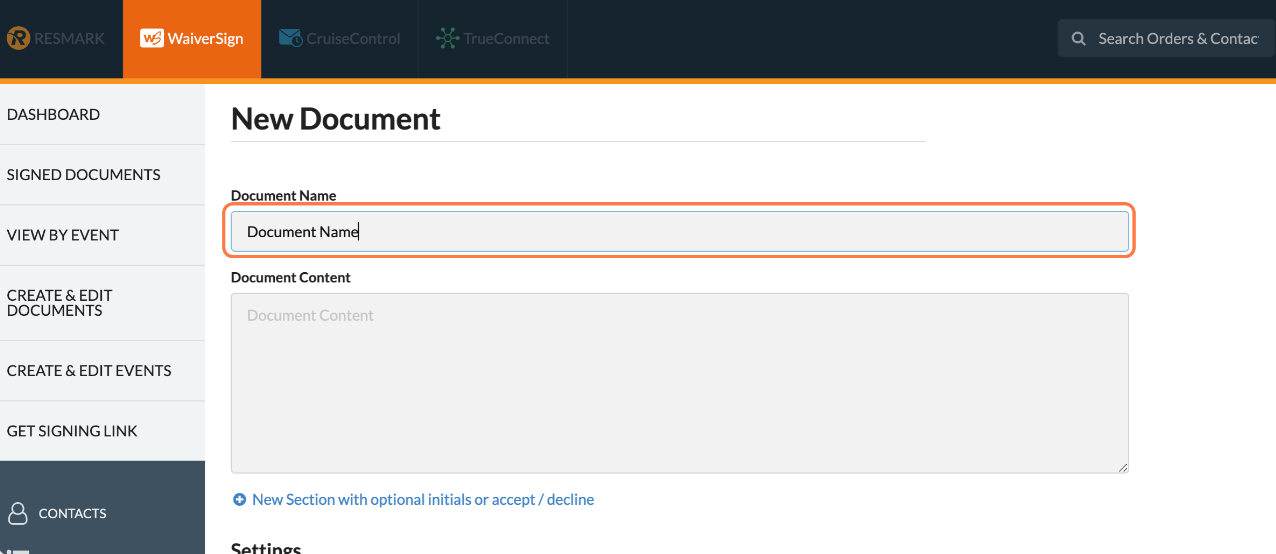
Step 3: Add document details including the name and the document details
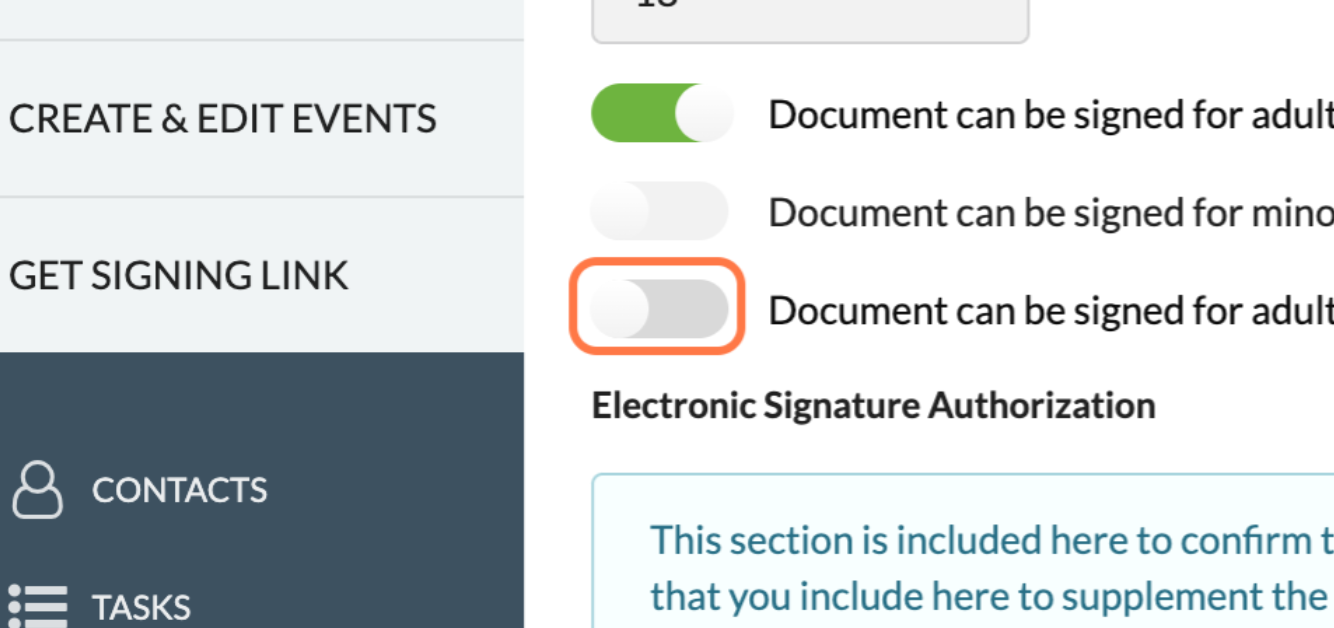
Step 4: Toggle off ‘Document can be signed for minors (under 18)’ and ‘Document can be signed for adult with accompanying minor’
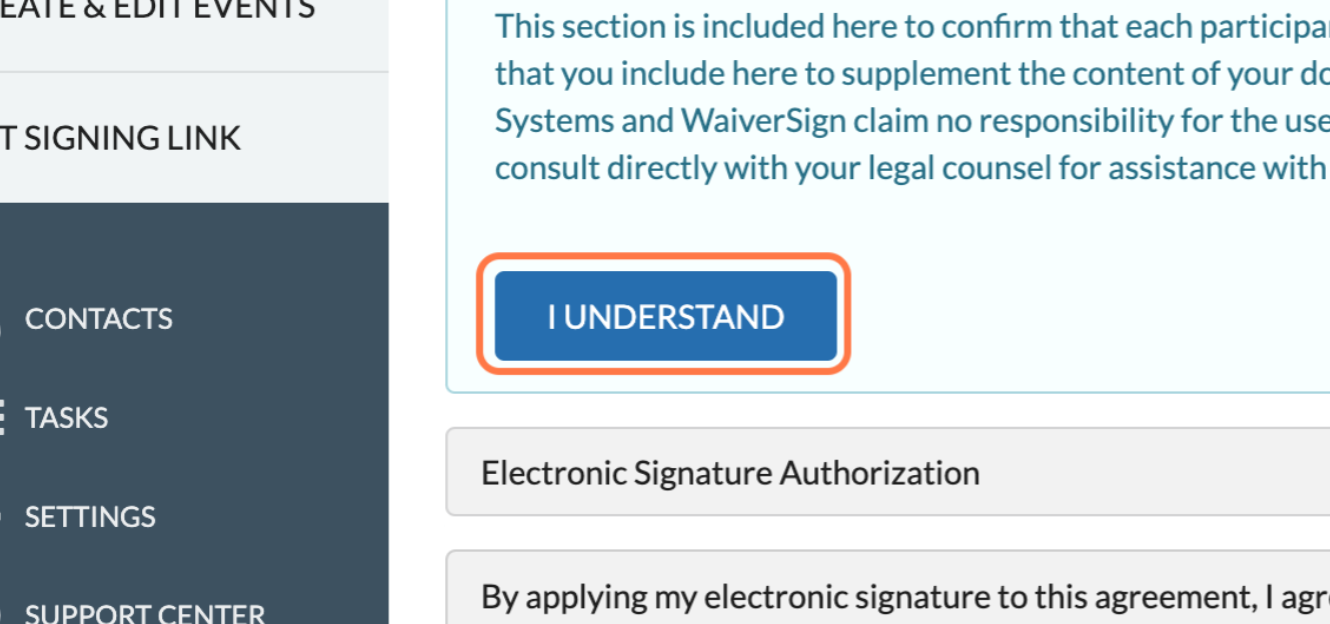
Step 4: Once the form is built out, click on ‘I UNDERSTAND’
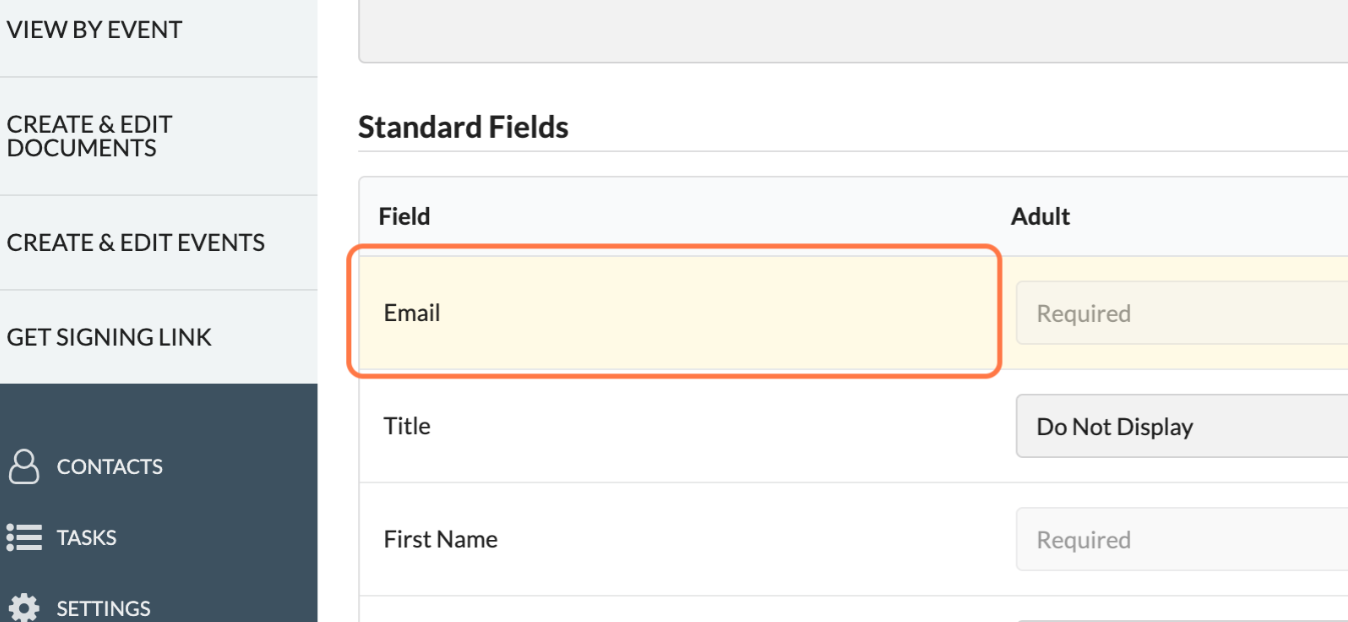
Step 5: Go through the ‘Standard Fields’ and select which field the users need to fill out
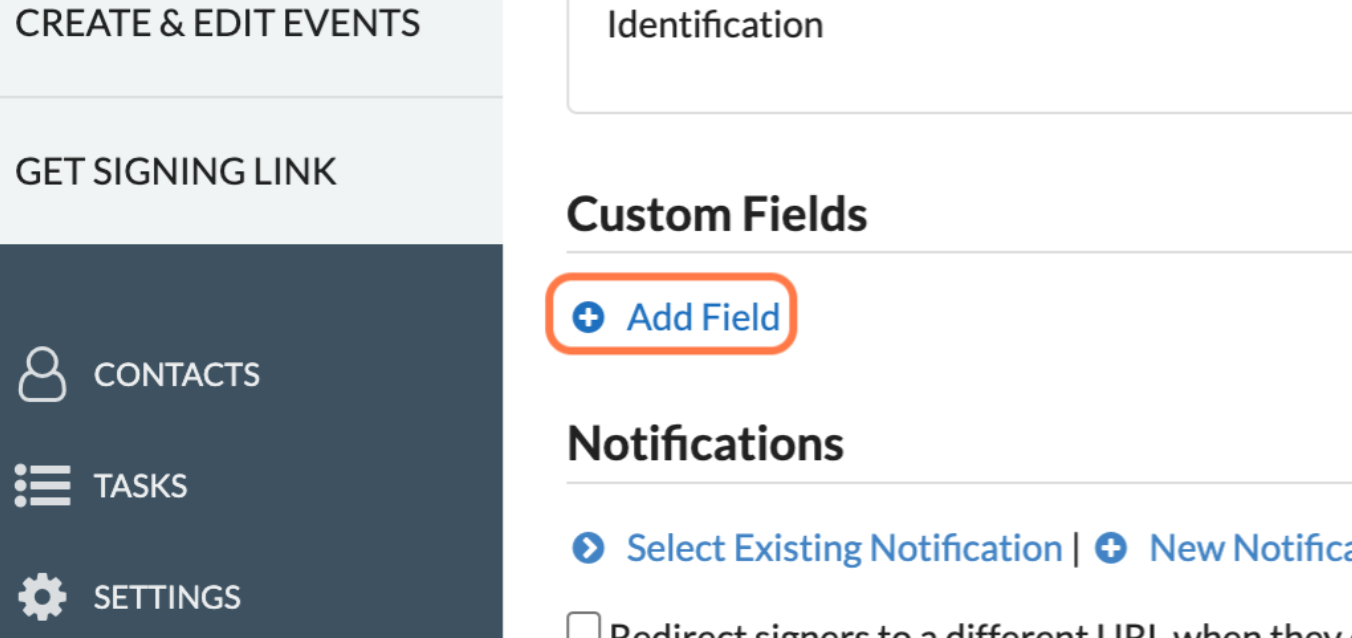
Step 6: Add ‘Custom Fields’ for any additional information needed.
Step 7: Set the notification email by selecting ‘New Notification.’ Type in your name and email to get a notification when a form is signed.
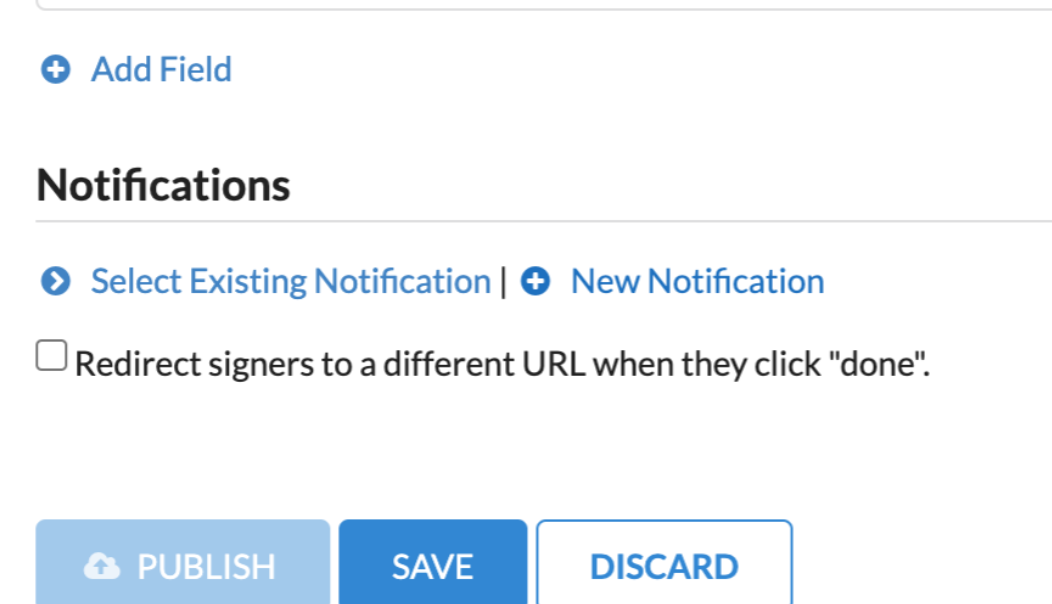
Step 8: Save the document
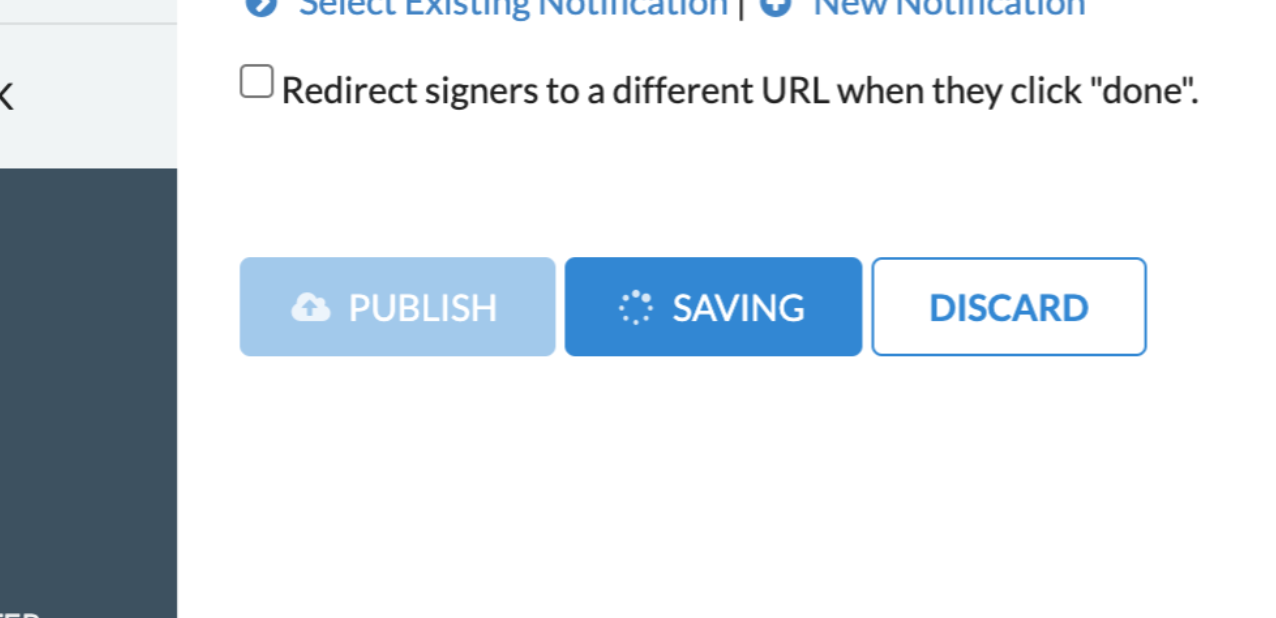
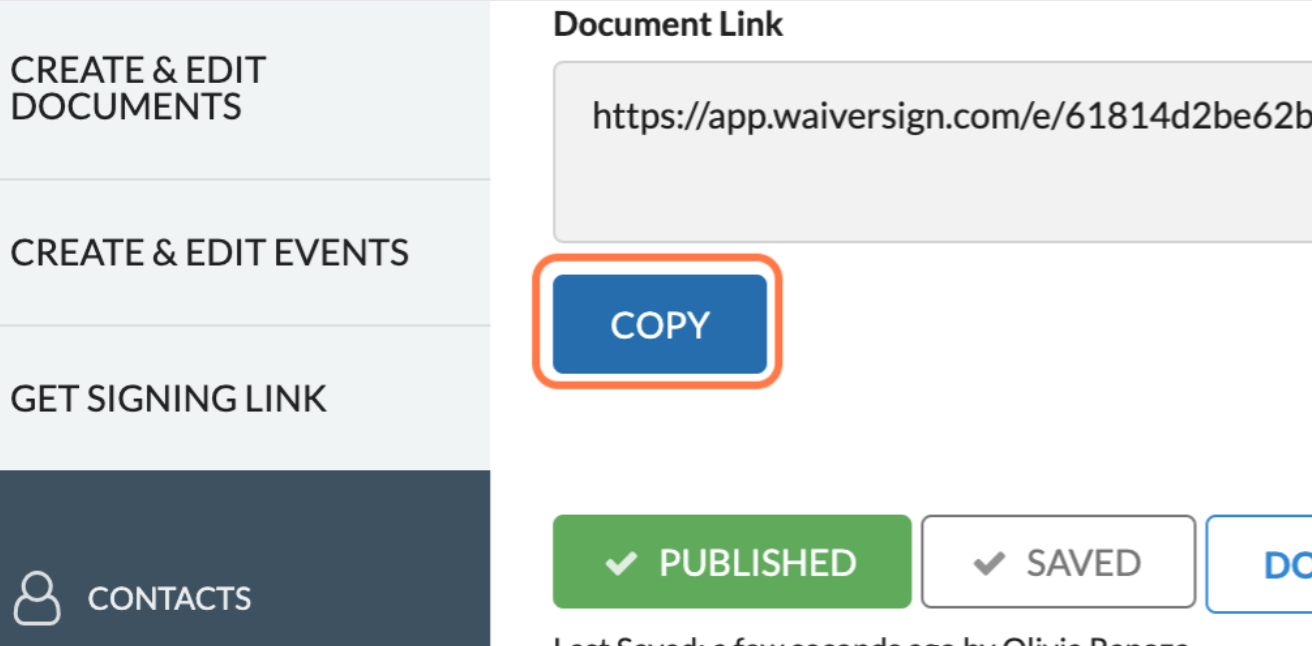
Step 9: Publish the document

The link will not generate and the changes to any existing waivers will not be available if ‘Publish’ is not selected after saving the form.
Step 10: Copy the link provided and place it in the content tile’s CTA button as an ‘external link’
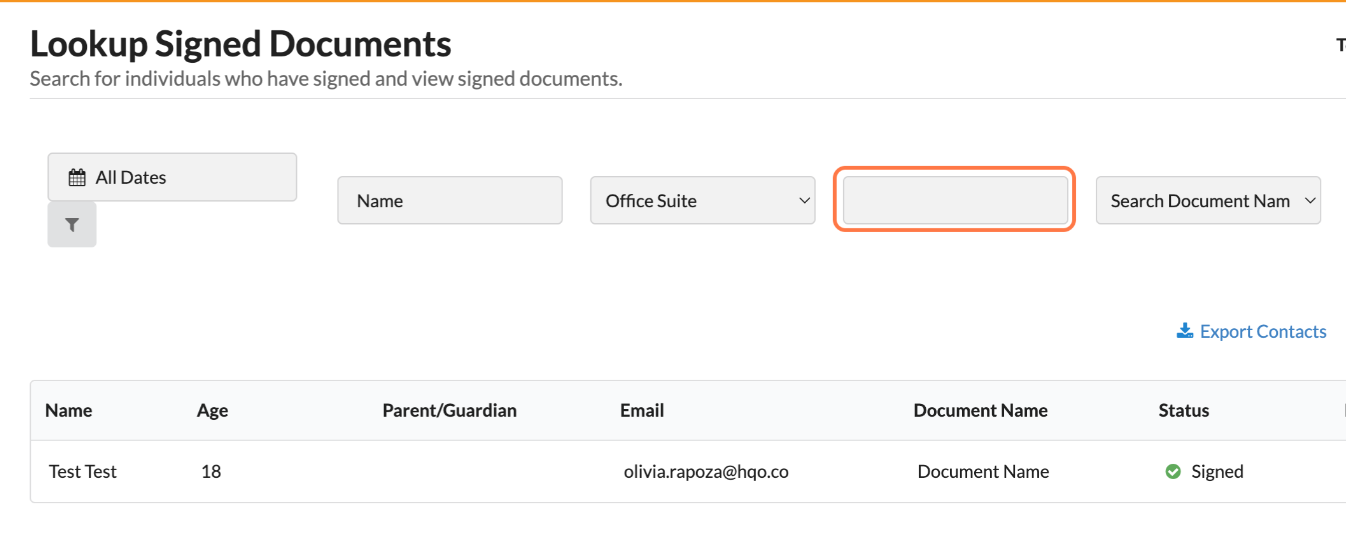
Viewing Signed Waivers
Step 1: Navigate to https://app.resmarksystems.com/login
Step 2: Navigate to ‘SIGNED DOCUMENTS’

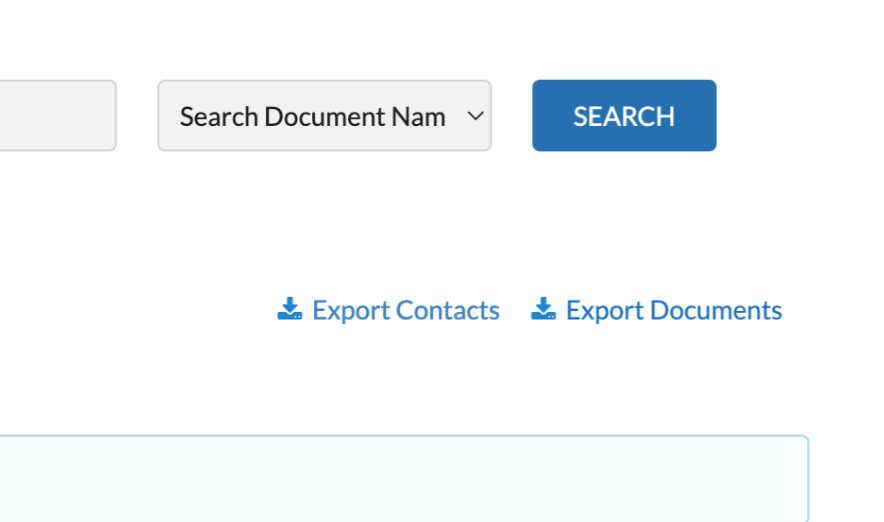
Step 3: View the sign documents in the table. The documents can be filtered by user date, name, custom fields, and document name.
Step 4: Select “Export Documents” to send the document to your email.
Adding to the HqO App
To add a WaiverSign form, you can include this in a Utility Button or in a CTA of a piece of content.
If you are looking to add a WaiverSign to a Utility Button, please reach out to your HqO Customer Success Manager.
If you are looking to add a WaiverSign to a piece of content, please view the instructions Content