HqO automatically sends email notifications for resource bookings, including confirmations, reminders, updates, and cancellations. Customize the branding of these emails with your logo and colors, ensuring a consistent, professional tenant experience that reinforces your property’s identity at every touchpoint.
Automated Emails:
HqO Resource booking will send you and your tenants automated emails at various stages of the booking process.
|
|
Event |
Recipient |
Content |
|---|---|---|---|
|
Booking Confirmation |
Admin confirms a pending booking Resource with automatic confirmation is booked |
Tenant |
Booking date, time, & amenities Resource name, description, & address Payment details if paid Copy of T&C |
|
Booking Requested |
Tenant Requests a Booking |
Admin |
Booking date & time Resource name, description, & address |
|
Booking Requested |
Tenant Requests a Booking |
Tenant |
Booking request notification Confirmation of T&C acceptance |
|
Booking Denied |
Admin denies booking |
Tenant |
Resource name Booking requested date Admin email to contact with questions |
|
Booking Cancelled |
Tenant cancels their booking |
Tenant |
Booking date & time Resource name, description, & address |
|
Booking Cancelled |
Tenant cancels their booking |
Admin |
Tenant name Booking date & time Resource name, description, & address |
|
Check-In Notification |
Resource requires check-in |
Tenant |
Check-in button Booking date & time Resource name, description, & address |
To turn off automated emails, take the following steps:
-
Go to the resource booking home page
-
Select the settings gear icon
-
Open the HqO integration
-
Check “do not send HqO booking email notifications”
-
Click “Save”
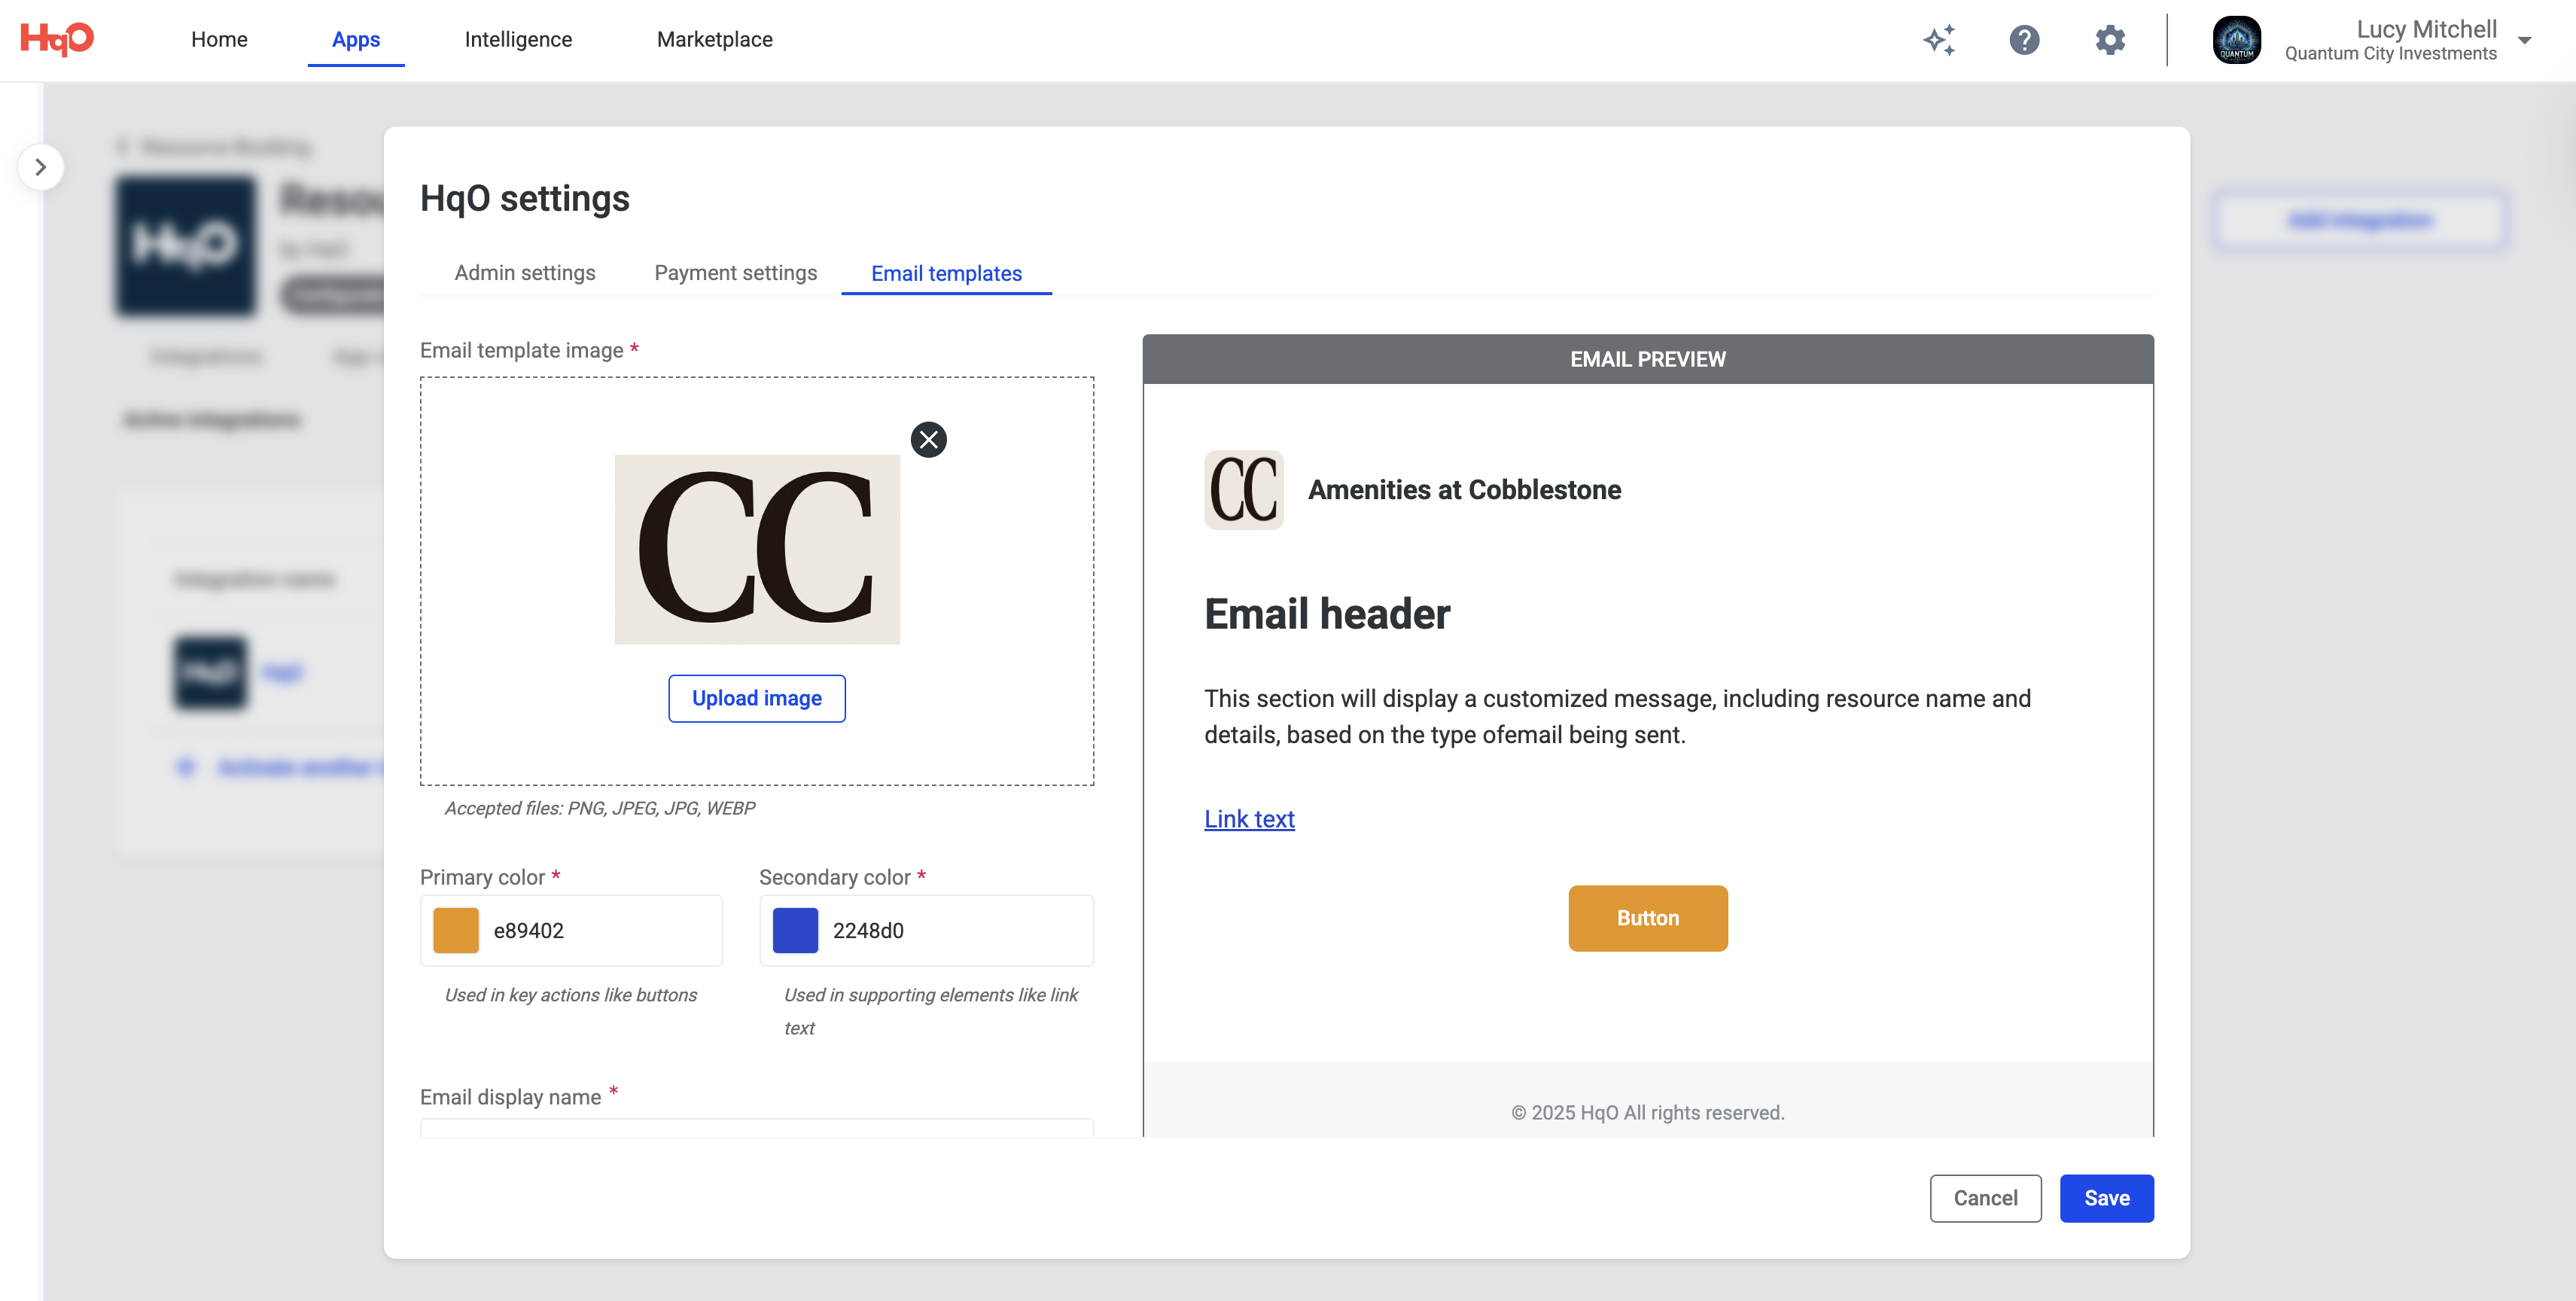
Email Branding:
Branding your resource booking emails ensures a seamless and professional tenant experience. Instead of receiving generic notifications, tenants see your property’s name, logo, and colors — reinforcing trust, consistency, and brand recognition at every touchpoint. This small detail helps elevate your building’s identity and creates a more polished, tenant-focused experience.
How to Customize Branding
-
Go to Admin Settings
-
From the HqO Admin resource booking dashboard, navigate to Settings.
-
-
Open the Branding Section
-
Under HqO integration settings, select Email Templates.
-
-
Upload Your Logo
-
Click Upload Logo and select a high-resolution version of your property or company logo.
-
Preview to ensure it displays correctly.
-
-
Set Brand Colors
-
Choose your primary and secondary colors.
-
These will appear in the header, buttons, and highlights of the email.
-
-
Set Your Send-From & Reply-To
-
If you have a domain saved on the platform, set your send-from using your domain.
-
Set the reply-to address where tenants can send their responses. This can be anything and doesn’t require you to have a domain saved.
-
-
Save Your Changes
-
Click Save to apply updates.
-
All future resource booking confirmations, reminders, and cancellations will automatically reflect your branding.
-