Visitor Kiosk
Configure a self-service check-in kiosk for your building lobby — allowing pre-registered and walk-up visitors to check in, notify their host, and receive a printed badge.
Overview
The Visitor Kiosk is a digital touchpoint installed in a building lobby that lets visitors check in without staff assistance. It supports three check-in flows:
-
QR code scan — pre-registered visitors scan the QR code from their invitation email for instant check-in
-
Email or phone lookup — pre-registered visitors without their QR code search by email or phone number
-
Walk-up (unregistered) visitors — visitors who were not pre-registered enter their details, select a host, and wait for host approval before receiving a badge
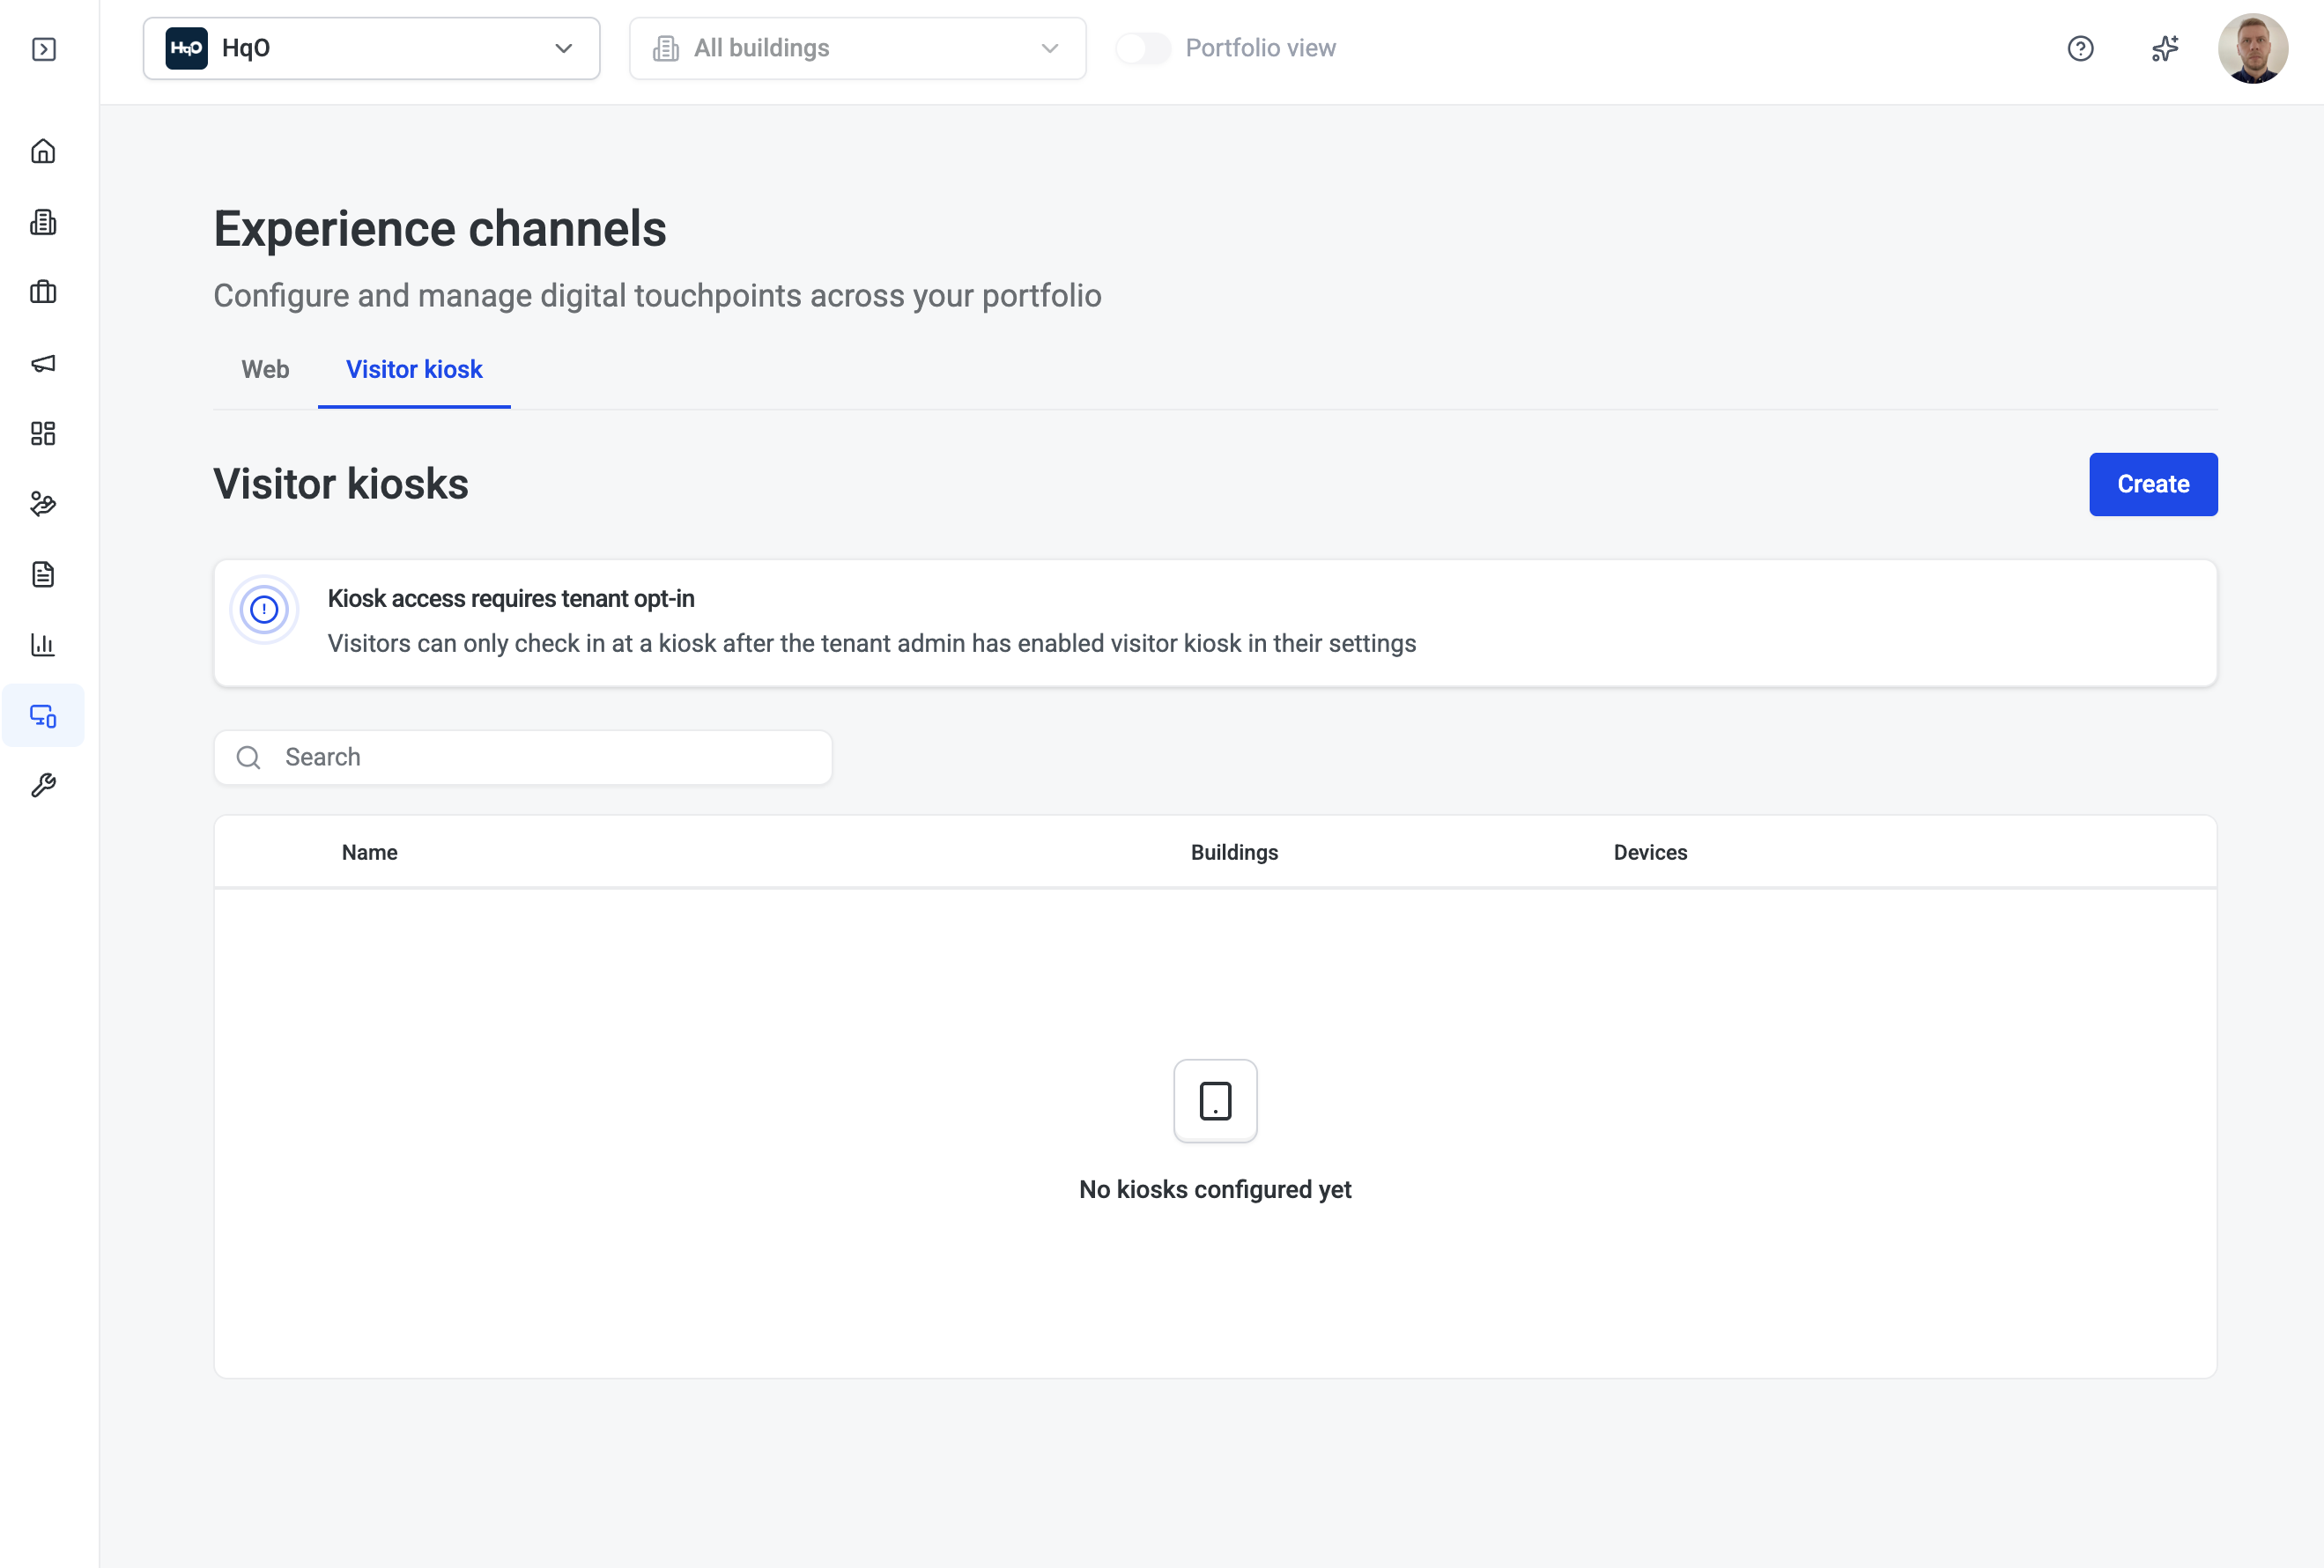
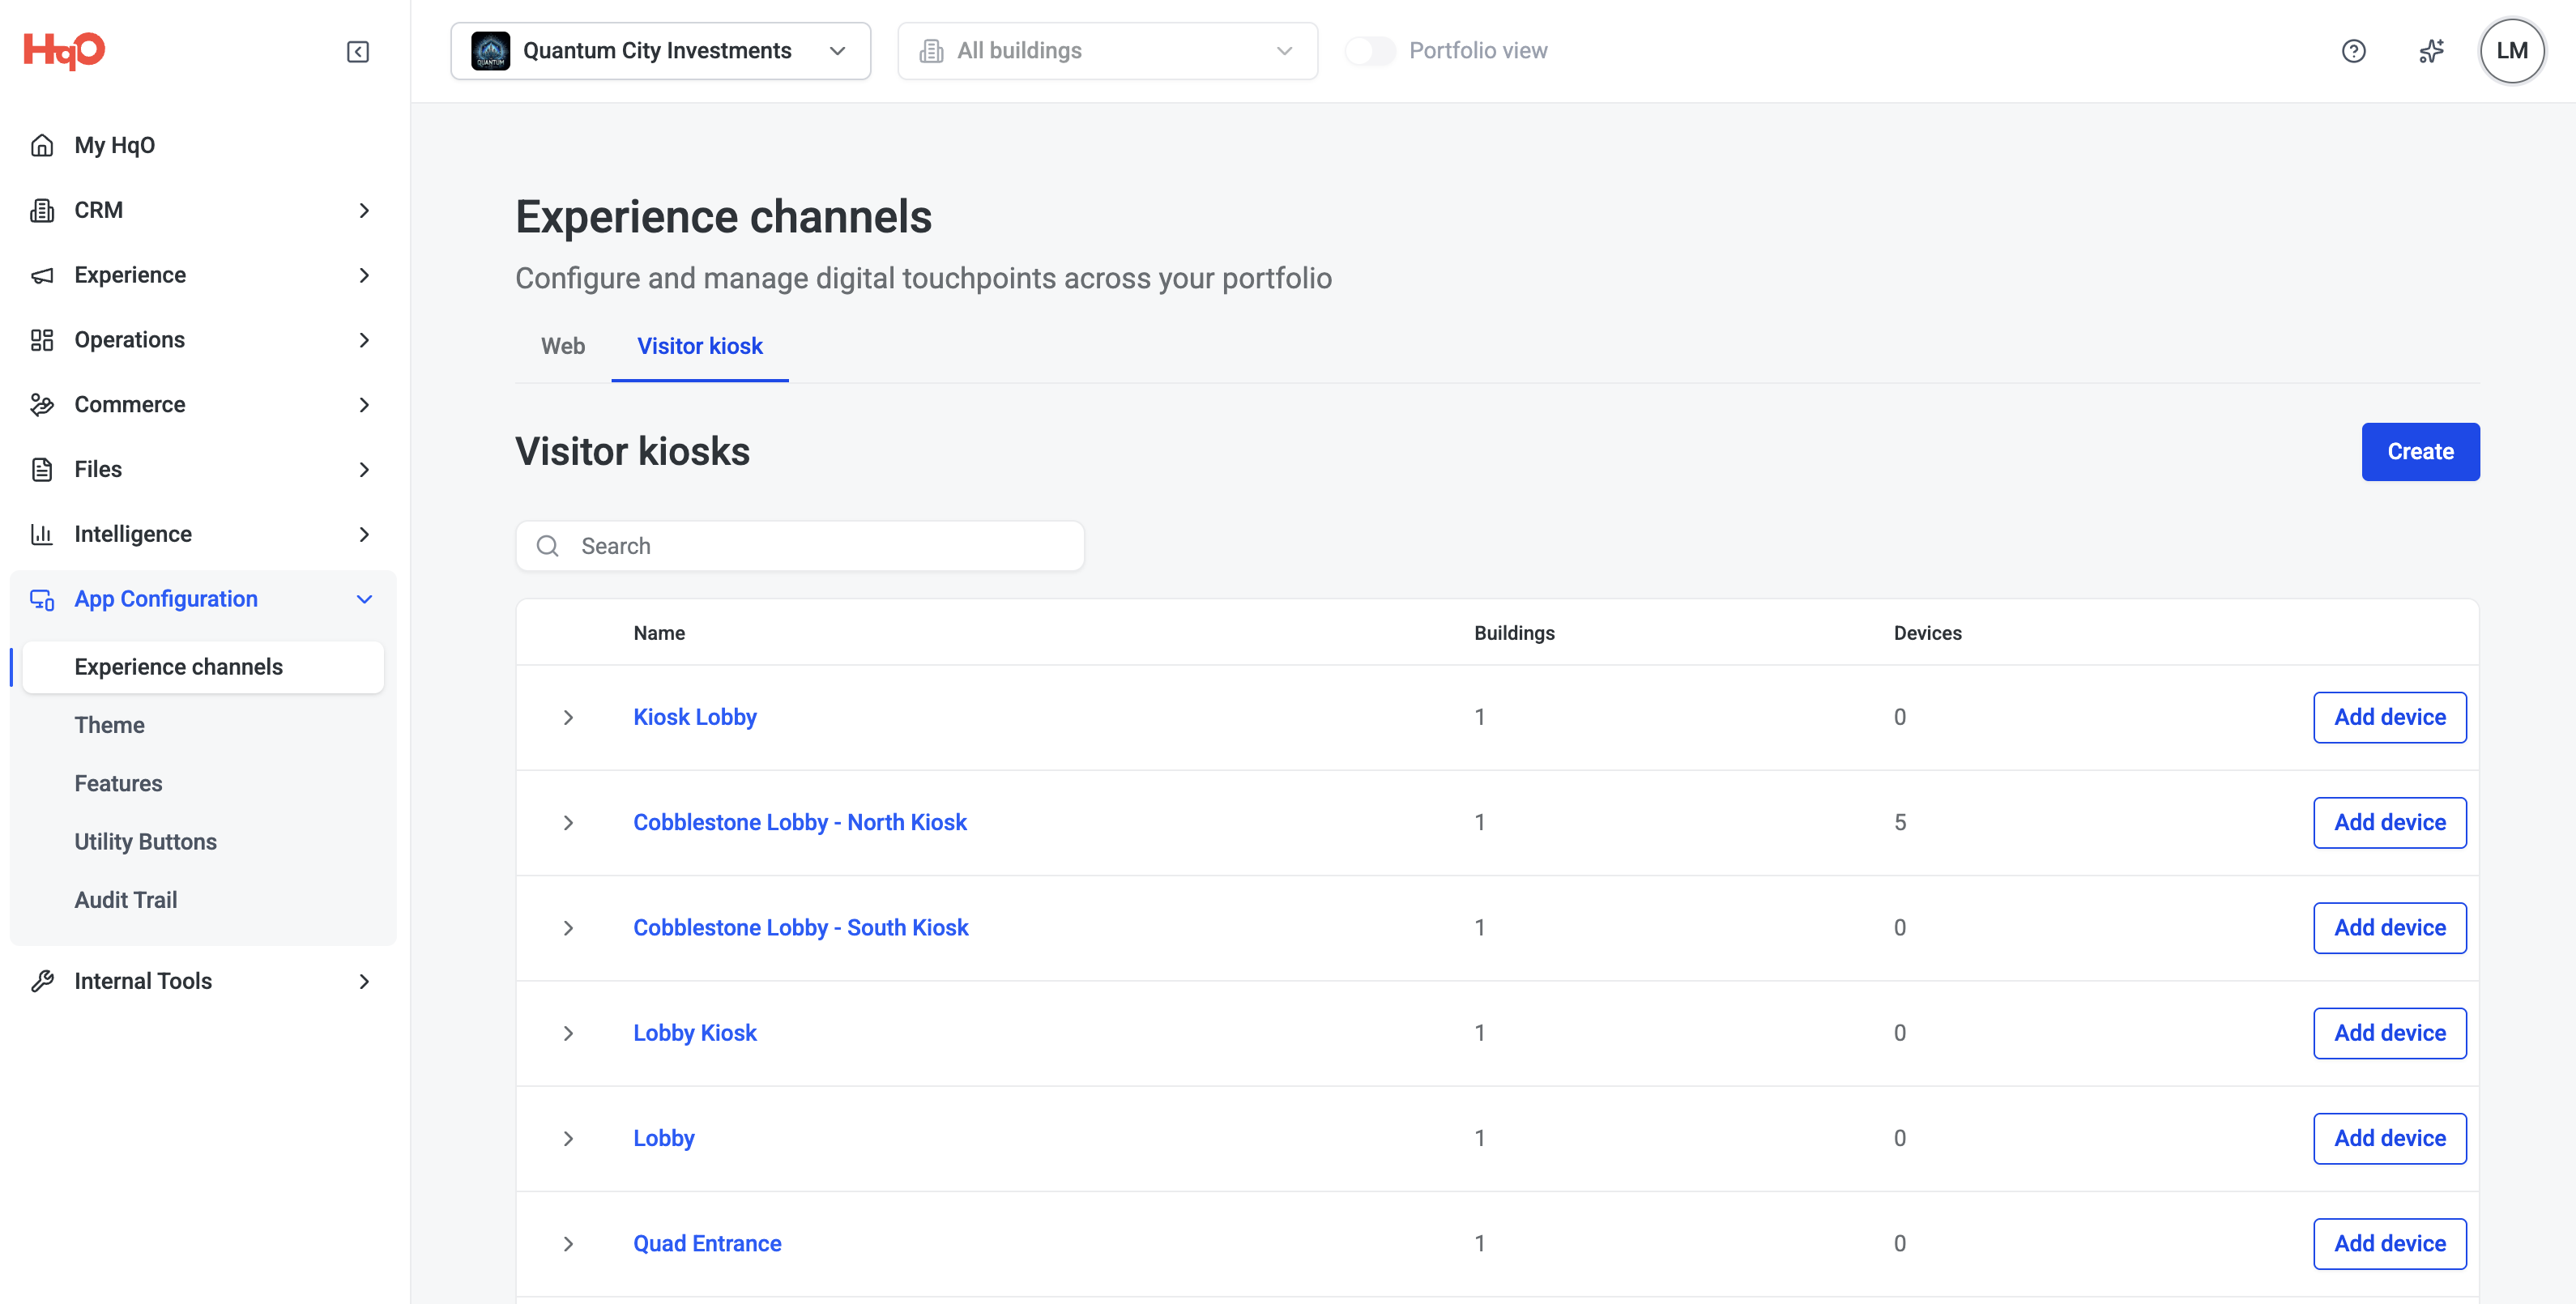
Kiosks are managed in HqO Admin under App Configuration → Experience Channels → Visitor Kiosk. Each kiosk configuration can be associated with one or more buildings, and multiple kiosks can share the same branding or be configured independently.
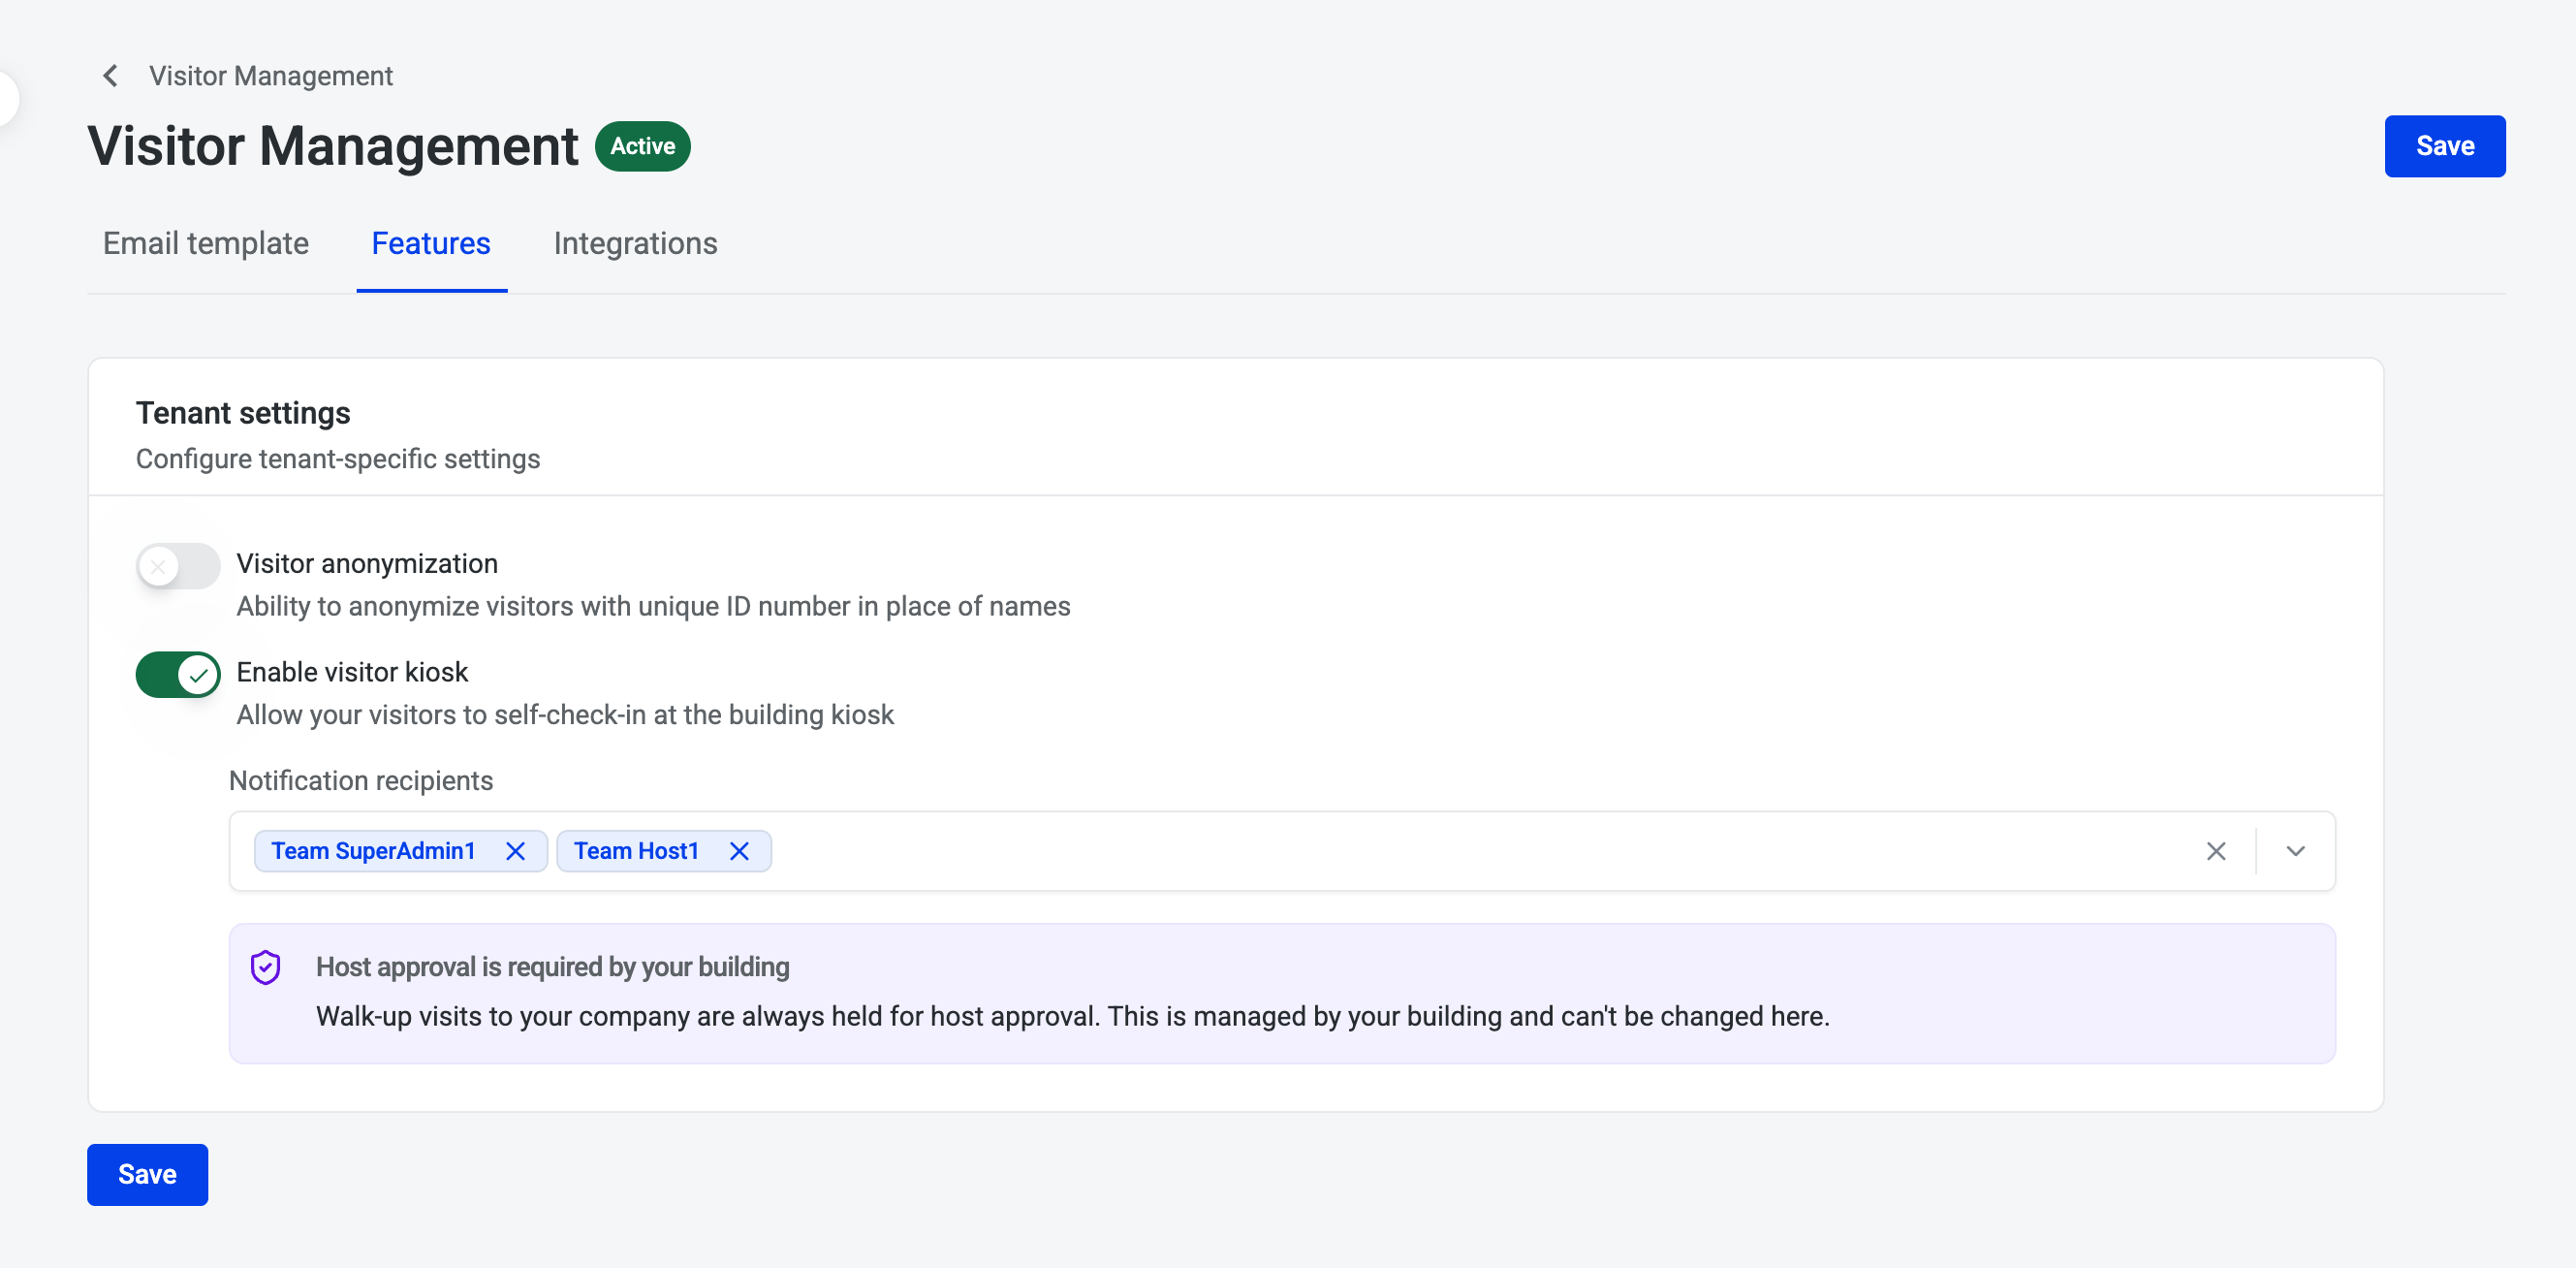
The kiosk feature must be enabled for each tenant company before it appears in HqO Admin. Tenant admins can enable this through visitor management settings.
Creating a kiosk
-
Go to App Configuration → Experience Channels in HqO Admin and select the Visitor Kiosk tab.
-
Click Create.
-
Give the kiosk a descriptive name (e.g.,
Main Lobby KioskorNorth Entrance). -
Configure Branding, Content, and Notifications using the tabs described below.
-
Click Save.
You can create multiple kiosk configurations — for example, one per building entrance — each with its own branding and settings.
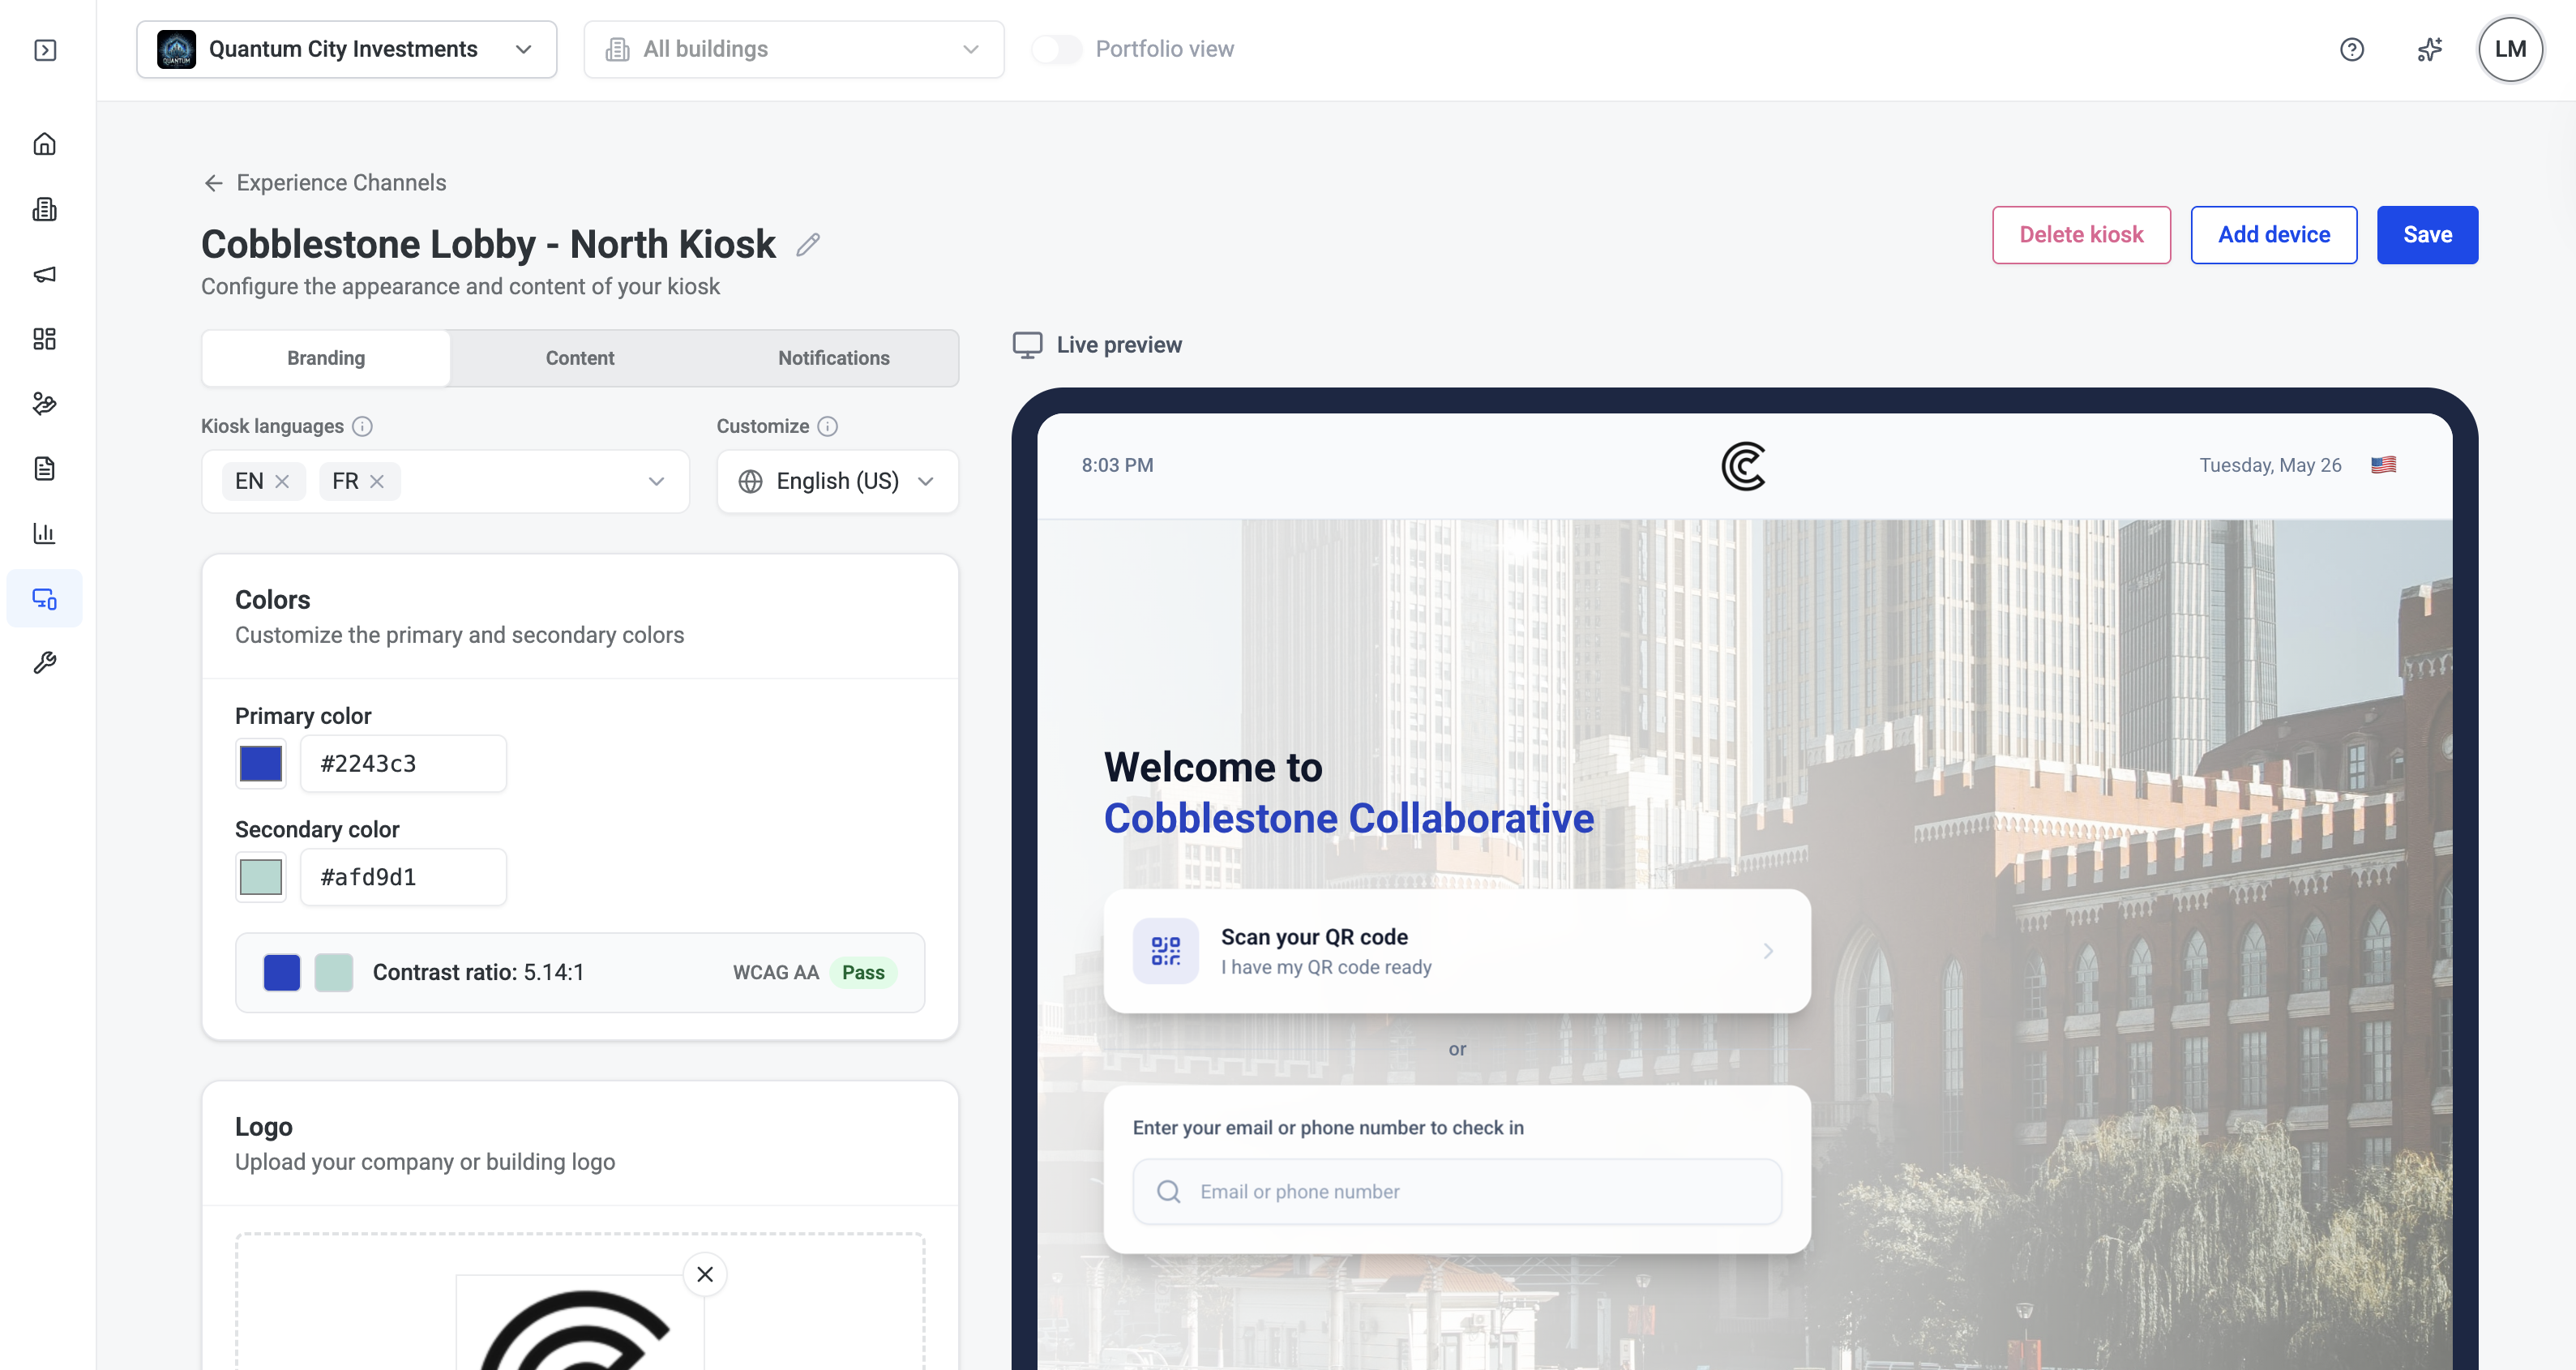
Branding
The Branding tab controls the visual appearance of the kiosk screen.
Colors
Set the Primary color and Secondary color to match your building or property brand. The admin interface displays the contrast ratio between your two colors and indicates whether the combination passes WCAG AA accessibility standards.
Logo
Upload a building or company logo to display in the top center of the kiosk screen. Accepted formats are PNG, JPEG, JPG, and WEBP (max 2 MB).
Background
Choose between a background Image or Solid Color:
-
Image — upload a photo to display behind the welcome screen (recommended size: 1920×1080px, max 5 MB)
-
Solid Color — select a flat background color
Associate buildings
Use the Buildings field to link the kiosk configuration to one or more buildings. The kiosk's welcome screen will display the building name automatically. If you leave the building name field blank in the Content settings, the system will pull the building name from the associated building record. To use a different name or branding per building, create separate kiosk configurations for each.
Language
Select the Kiosk language and the display language for the welcome screen. Supported languages appear in the dropdown. Visitors can toggle between languages through the flag icon in the top right.
Content and check-in options
The Content tab controls the text displayed on the kiosk and which check-in methods are available to visitors.
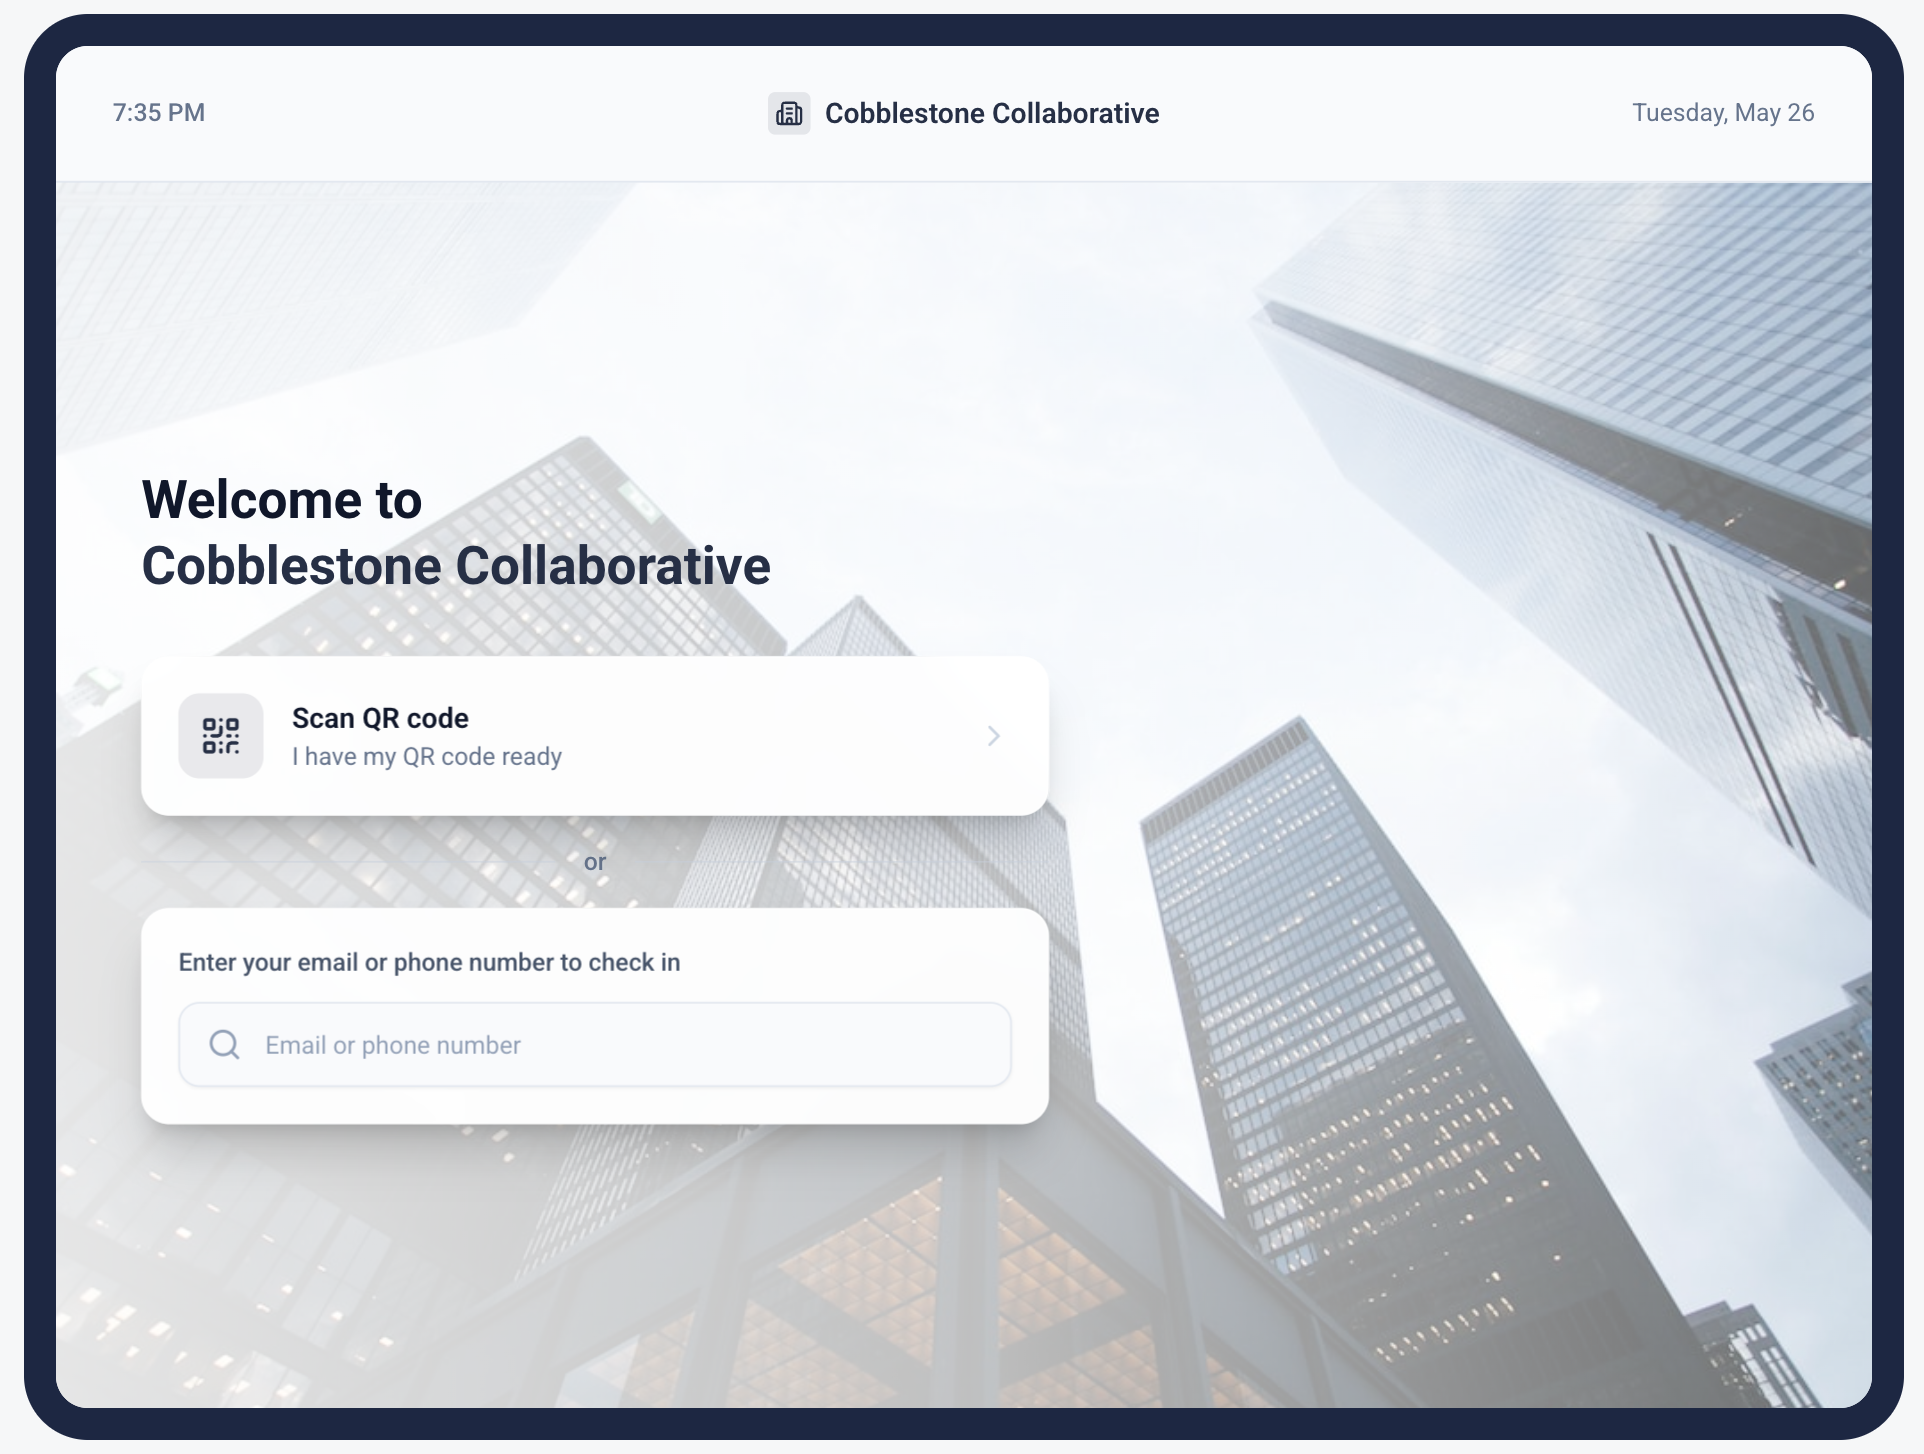
Welcome screen
Customize the message shown on the kiosk home screen:
|
Field |
Default |
Notes |
|---|---|---|
|
Welcome text |
Welcome to |
Displayed above the building name |
|
Line two |
Building Name |
Displayed below the welcome text, this can be overridden to display a campus name or something else of your choosing |
Check-in options
Enable or disable the available check-in methods using the toggles. For each enabled method, you can customize the display text shown to visitors.
Scan QR code
-
Toggle on to allow visitors to scan the QR code from their invitation email
-
Customize Primary text (e.g.,
Scan your QR code) and Helper text (e.g.,I have my QR code ready)
Email/phone lookup
-
Toggle on to allow visitors to search for their registration by email or phone number
-
Customize the Label text and Input placeholder shown on the search field
Visitor information fields
For walk-up (unregistered) visitors, choose which additional fields appear on the visit request form:
-
Visitor company — toggle on to request the visitor's company name
-
Reason for visit — toggle on to request the purpose of the visit
Pending approval screen
Customize the title and message shown to a walk-up visitor while they wait for their host to approve or deny the visit. The default title is Host notified.
Notifications
The Notifications tab controls the emails and text messages sent throughout the visitor check-in flow. All notification templates support the following variables:
|
Variable |
Description |
|---|---|
|
|
Full name of the visitor |
|
|
Name of the visitor's requested host |
|
|
Name of the building |
Host notifications
These are sent to the tenant host when a walk-up visitor arrives and requests a meeting.
To assign specific approvers per tenant company, configure approval recipients in tenant Visitor Management settings. Multiple approvers can be added per tenant so that someone is always available to respond.
Email notification — toggle on to send hosts an email when approval is needed. Customize the subject line and body. Default body: {visitor_name} is requesting to visit and needs your approval
Text notification — toggle on to send hosts an SMS. Default message: {visitor_name} is requesting to visit. Please approve or deny in the admin portal.
Visitor notifications
These are sent to the visitor at each stage of the walk-up approval workflow.
Pending approval
Sent when the visitor's request has been submitted and is awaiting host review.
-
Default email subject:
⏳ Your visit request has been submitted -
Default email body:
Your host has been notified and will review your request shortly.
Visit approved
Sent when the host approves the visit.
-
Default email subject:
✅ Your visit has been approved! -
Default email body: directs the visitor to return to the kiosk and scan the QR code to print their badge
Visit denied
Sent when the host denies the visit.
-
Default email subject:
Visit request update -
Default email body:
Your visit request could not be approved at this time.
Guard notifications
Visit request denial banner — toggle on to display a banner in the building security dashboard when a walk-up visitor's request is denied. Customize the message to instruct security staff on next steps. Default: {visitor_name}'s walk-up visit request denied — please ensure visitor leaves the building
Pairing a device
The kiosk configuration in HqO Admin must be paired with a physical tablet running the HqO Visitor Kiosk app before visitors can use it.
Recommended hardware:
|
Device |
Best for |
|---|---|
|
iPad |
High-traffic lobbies, Class A buildings — best-in-class touch accuracy, long OS support, broad kiosk mount ecosystem |
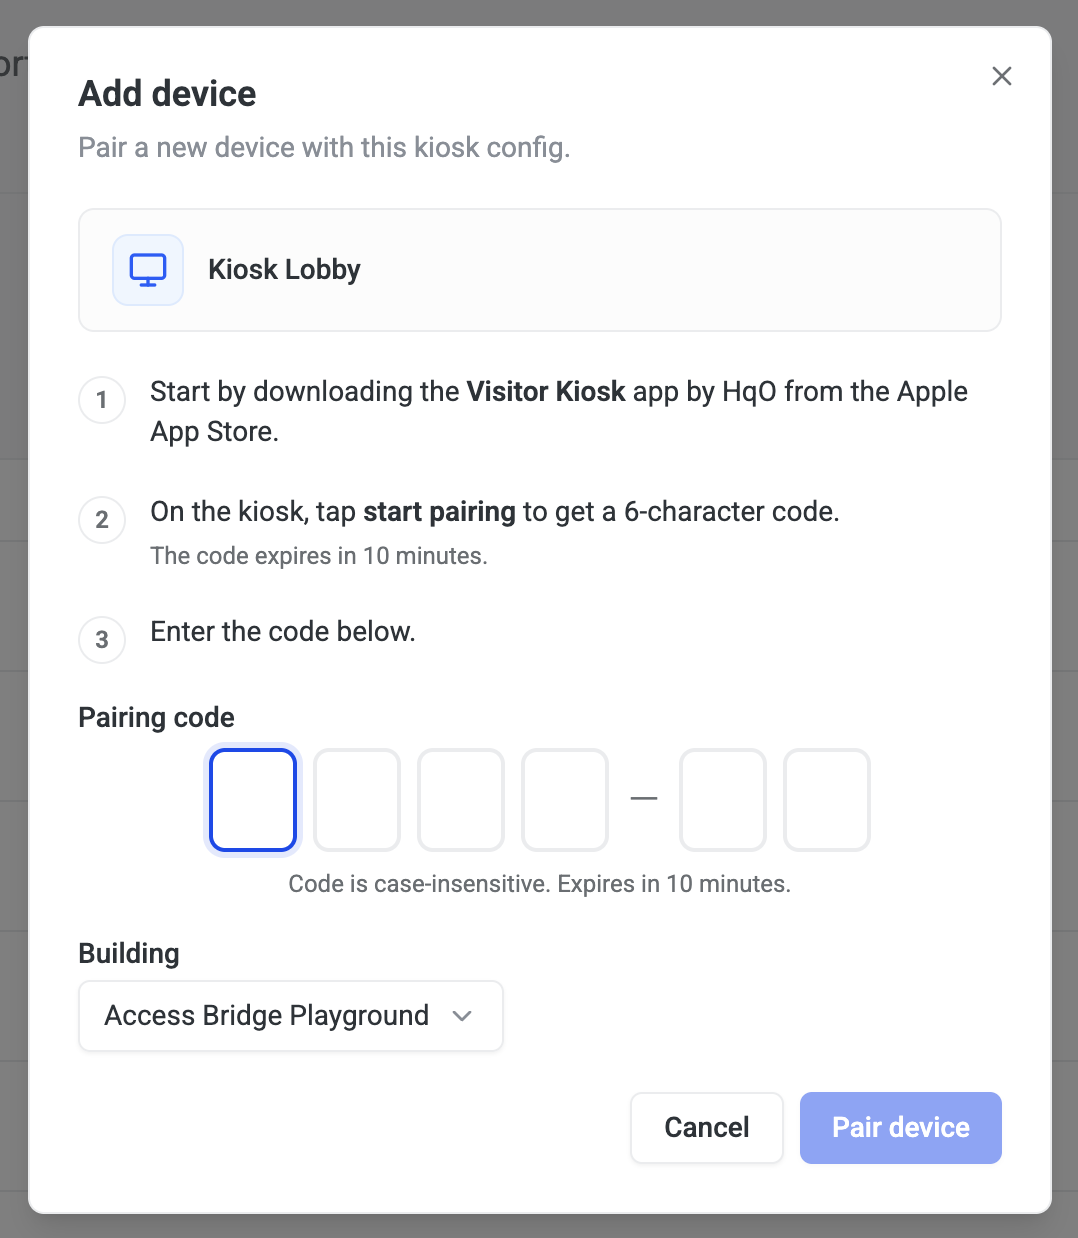
To pair a device:
-
Download the Visitor Kiosk app by HqO on the iPad from the Apple App Store.
-
In HqO Admin, open the kiosk configuration and click Add device.
-
Follow the on-screen pairing instructions to link the tablet to the kiosk configuration.
Once paired, the device will display the configured welcome screen and check-in options. The kiosk app connects to local printers for badge printing — badge size and QR code formatting follow the settings configured in Visitor Management.
How the visitor experience works
Pre-registered visitor with QR code
-
Visitor scans the QR code from their invitation email at the kiosk.
-
The system retrieves and validates the visit record.
-
Visitor confirms their details on screen.
-
Badge prints automatically with visitor name, host, company, and visit date/time.
-
Host receives a notification: the visitor has checked in.
The full process is designed to complete in under 30 seconds.
Pre-registered visitor without QR code
-
Visitor enters their email or phone number at the kiosk.
-
The system displays matching visit records.
-
Visitor selects their visit and confirms details.
-
Host is notified of check-in.
Walk-up (unregistered) visitor requiring host approval
-
Visitor enters their name, company (optional), and reason for visit.
-
Visitor searches for their host by name or company.
-
Tenants must opt-in to appear in the search field
-
-
The system sends the host a real-time approval request via email and/or SMS.
-
Host taps Approve or Deny in the admin portal or via the notification.
-
Kiosk updates within seconds:
-
Approved — badge prints and visitor proceeds; host receives a check-in confirmation
-
Denied — kiosk displays a message to the visitor; security guard dashboard shows a denial banner
-
Idle timeout
If a visitor starts check-in but walks away without completing it, the kiosk automatically returns to the home screen after 30 seconds of inactivity.
Tenant opt-in and approvals
Tenants must opt in to the kiosk system before their company name appears in the host search for walk-up visitors. Configuring the kiosk in HqO Admin does not automatically register tenant companies.
To ensure tenants are set up correctly:
-
Tenant administrators must enable kiosk participation in their Visitor Management settings.
-
Tenant admins should add multiple approvers for their company so that if one host is unavailable, another can respond to walk-up requests.
If tenants are not seeing their company in the kiosk host search, confirm they have completed opt-in in Visitor Management settings.